Saturday, October 31, 2009

HAPPY HALLOWEEN!


Halloween Costume - Part 4

The last thing I had to do today to complete my costume was to make my lion's tail. I chose to use a sample piece of upholstery fabric I found at SCRAP and more fringy scraps (the same as the mane) for the end of the tail.

First I cut the upholstery into a long strip, about 4" wide and gathered my fringy scraps together.

Next I placed my fringy scraps onto the right side of the upholstery fabric with the ends meeting together.

Then I folded over the upholstery and pinned it together at the edge. I made sure that the fringe was on the inside so that when I turned it inside out, they would be visible at the end of the tail.

Sew sew sew along the edge. I left a 1/2" seam allowance. Also sew over the end where the fringe is to secure it.

The last step was to turn it inside out (so that now the right side + fringe are on the outside) and add a little stuffing to give it some extra shape.


Costume complete! Now its time for makeup, and putting everything together!
See the entire process of this costume:
Part 1
Part 2
Part 3

Wednesday, October 28, 2009

All I want for christmas is...

THIS AMAZING SHIRT! Talk about awesome! I found this via My Love For You and am speechless! Only illustrator/designer Julia Sonmi Heglund could create something so freaking cool!
This "Friends Forever" t-shirt is for sale at Threadless. If anyone is wondering what to get me for xmas, I wear a size large :-)

All of her work is really great. Here are a few more of my favorites.

Crafty Wonderland!


I'm excited to announce that I will be at Crafty Wonderland on November 8th. A great way to support your local community and buy handmade this holiday season! 40+ local artists/crafters will be selling their wares. Come by and say hello!
http://craftywonderland.com/

Friday, October 23, 2009

Friday Inspiration: Fall Fashion

Happy Friday everyone! I've wanted to post about all the cool stuff I've been finding in my blog reading. Today I decided to share with you some fashion inspiration I really like :) Have a great weekend!

via Gypsy Girl's Guide

via fly

via All Mighty

via the cherry blossom girl

Wednesday, October 21, 2009

Dame Darcy

I just stumbled upon the work of Dame Darcy via Parasol Magazine. I totally dig her style and all of her work is so interesting. I so want to get my hands on one of her comics. Also, check out her animated short Golden Shoes.


Tuesday, October 20, 2009

It's getting close to that time of year...

Just added to my shop today! My brand new holiday greeting cards.


campsmartypants.etsy.com

Sunday, October 18, 2009

Halloween Costume - Part 3

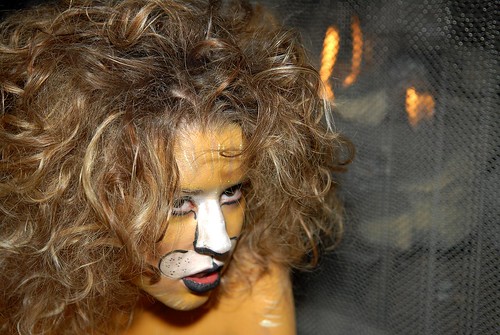
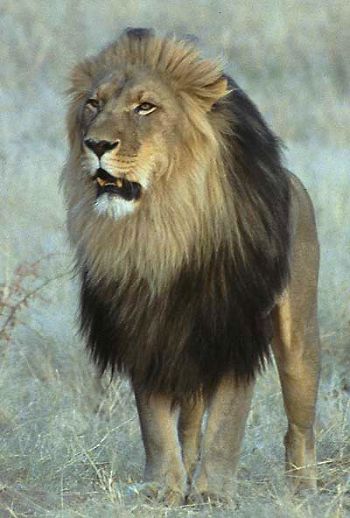
*For those of you who've just stopped by, I am in the process of making my own lion costume for Halloween. Take a look at Part 1 and Part 2.

Ok, next I made the arm/wrist cuff things for my costume. I decided to go ahead and document my process step-by-step for your viewing pleasure :)

Step 1: Cut the fabric. Using a piece of scrap faux suede, I cut a rectangle. I wrapped it around my arm first to determine how much fabric I wanted. After cutting, I then cut a whole in the center for my thumb.

Step 2: I folded the rectangle in half and cut fringe. Again, slipping my arm in to measure how long to make my cuts. I wanted to be able the tie the fringe snug around my arm/hand.

Step 3: Tie the fringe together in knots. I cut the fringe a little longer in certain places as I tied to make sure it felt snug to my arm.

Step 4: Adding paw pads. I used some pieces of dark leather samples to add a paw pad (I don't know if there's another name for this?). I first drew a template on a piece of paper and then cut the shape out of the leather. Then I glued it into place on the palm of my hand with Aleene's craft glue.


Step 5: In order to add extra fringe, I decided to sew large stitches along the edge of the suede fringe w/ embroidery floss so that I would have something to tie extra fabric strips to.

Step 6: Cut scrap fabric/yarn into strips and tie to the large orange stitches. I decided to only tie fabric part way up the arm.

Ta Da!

I made two of these (one for each arm).

Saturday, October 17, 2009

Halloween Costume - Part 2

So I decided to start with the lion mane, because I thought it would be the toughest part of the costume to figure out. First I crocheted a hat with ear flaps using this pattern as my guide.

Then I made the ears using a piece of metallic scrap leather. I sewed these my hand onto the hat. Next, I started cutting strips out of the scrap fabric/yarn I had collected, tying it onto the crochet hat.


I kept adding more and more fabric and yarn until the entire hat was covered.

Ta Da!

Oh! And, per Alison's request....


Stay tuned for more updates on the rest of the costume development. Next I am going to be working on wrist cuffs and ankle cuffs. Here is a sketch of what I'm thinking the end result might turn out like. I'm contemplating actually turning my lion costume into a Leo costume, by adding the sign for Leo and stars. Still unsure about that idea, but we'll see....


What are your costume plans for this year?

Thursday, October 15, 2009

Halloween Costume!

Halloween is my favorite holiday by far. I haven't dressed up for it in years, so to make up for it, I'm planning on making a sweet Lion costume this year. Being both crafty and broke, I am going to make it from all recycled materials. So today I went to SCRAP to look for some fabric and yarn to use to make the Lion Mane.

Also, I've been looking at a lot of lion inspiration to get ideas on how I want to make my costume:


I'm going to post my costume-making progress as I go, so check back to see how it comes together!! Also, if anyone has any lion ideas/inspiration to share, that'd be awesome :)
Related Posts with Thumbnails